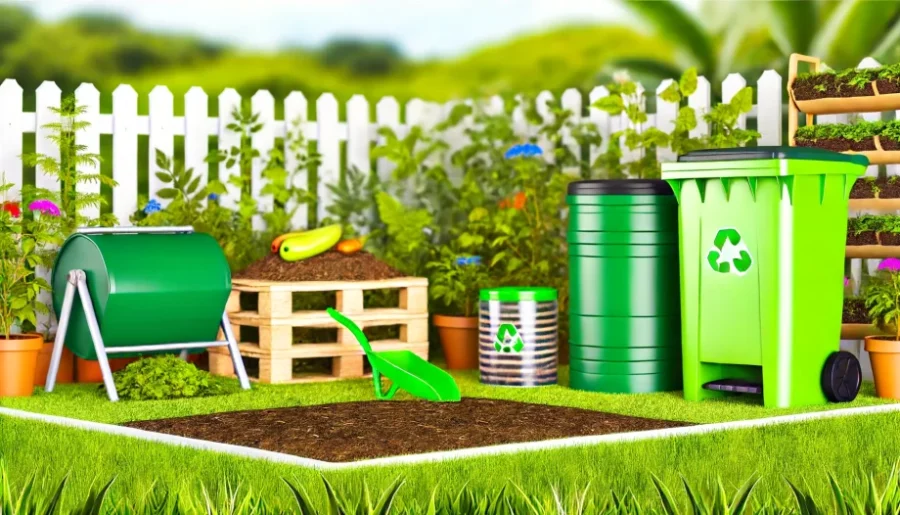
Composting methods at home can seem overwhelming, but it’s actually quite simple and beneficial.
Imagine turning kitchen scraps into rich soil right in your backyard. The problem is, many people don’t know where to start.
With the right guidance, you can transform waste into a gardening goldmine, helping your plants thrive and reducing landfill waste.
Composting Methods Key Takeaways:
- Composting at home involves methods like using bins, tumblers, or worms to turn kitchen scraps into rich soil.
- It reduces waste and enhances garden soil, making it an eco-friendly practice for any household.
This guide builds on the environmental and practical benefits covered in our Composting Benefits guide.
What is Composting?
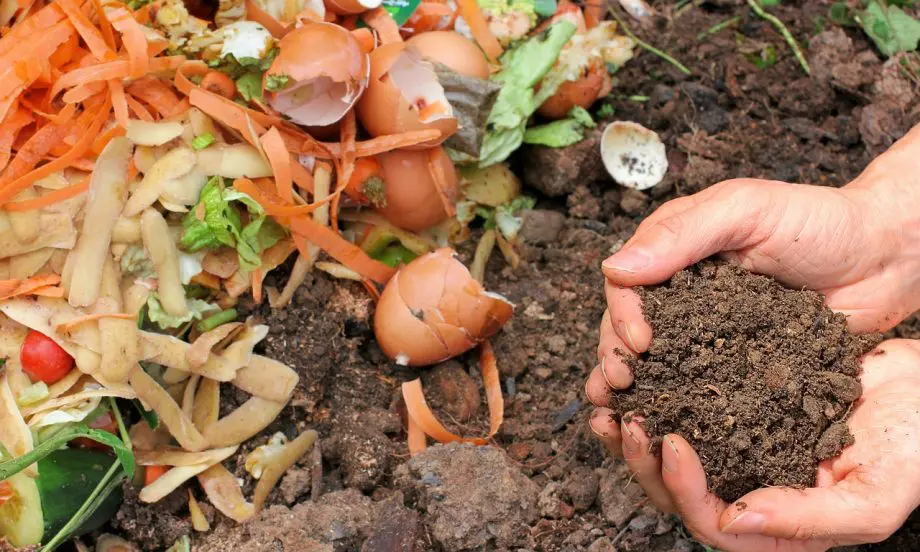
Composting is the natural process of turning your kitchen scraps and yard waste into nutrient-rich soil.
Think of it as recycling for your garden! It’s all about letting organic matter break down and turn into something beneficial for your plants.
Compost is a mixture of ingredients used as plant fertilizer and to improve soil’s physical, chemical, and biological properties. It is commonly prepared by decomposing plant and food waste, recycling organic materials, and manure. The resulting mixture is rich in plant nutrients and beneficial organisms, such as bacteria, protozoa, nematodes, and fungi. Compost improves soil fertility in gardens, landscaping, horticulture, urban agriculture, and organic farming, reducing dependency on commercial chemical fertilizers.https://en.wikipedia.org/wiki/Compost
Basic Tips for Composting Methods at Home
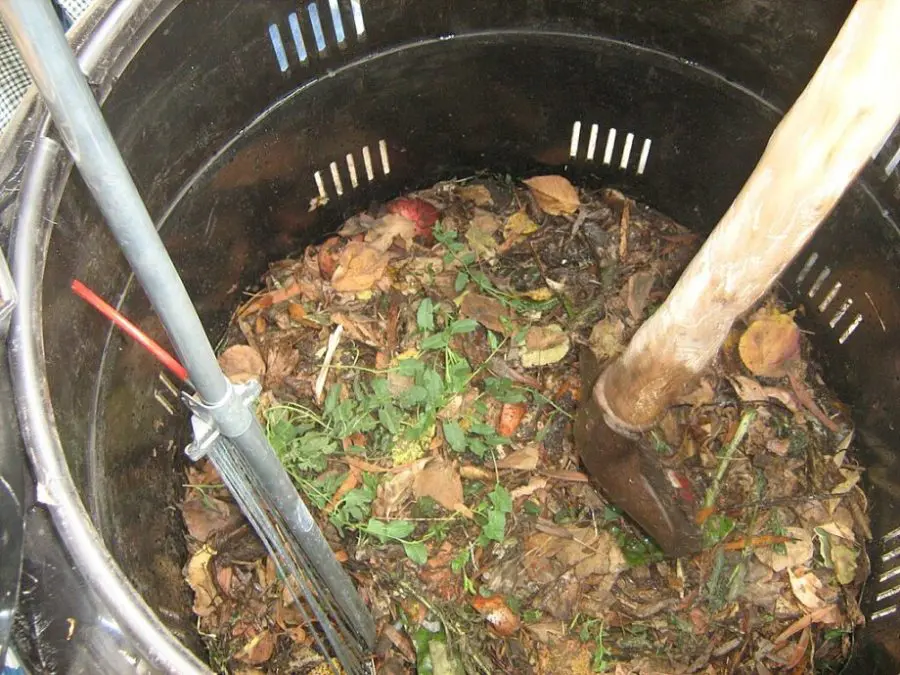
Getting started with composting at home can be easy and rewarding. Here are some essential tips to help you out:
1. Choose the Right Method
Whether you’re using a compost bin, a tumbler, or vermicomposting with worms, pick a method that suits your space and needs.
2. Balance Greens and Browns
For successful composting, you need to balance “greens” and “browns.”
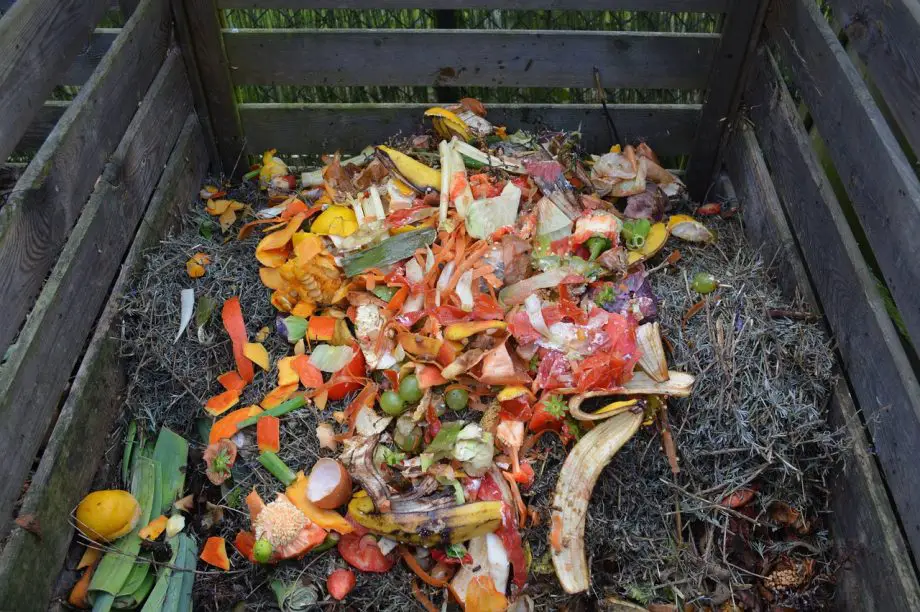
Greens are rich in nitrogen and include vegetable scraps, fruit peels, and coffee grounds.
Browns are carbon-rich and include dry leaves, cardboard, and straw. A good mix helps the compost break down efficiently.
3. Keep it Moist
Your compost pile should be as damp as a wrung-out sponge. If it’s too dry, add water.
If it’s too wet, add more dry materials like straw or cardboard. Proper moisture levels help the microorganisms in your compost thrive.
4. Turn the Pile Regularly
Turning your compost pile regularly helps to aerate it, speeding up the decomposition process.
For compost bins and piles, use a pitchfork or compost turner. If you have a compost tumbler, just give it a spin.
5. Avoid Certain Items
To keep your compost healthy, avoid adding meat, dairy, or oily foods as they can attract pests and create odors.
Also, steer clear of adding diseased plants or weeds with seeds to prevent any unwanted issues.
6. Patience is Key
Composting is not an overnight process. It can take several months to a year for your compost to be ready.
Be patient and keep adding materials regularly. Your garden will thank you for it!
Using the Compost
Once your compost is ready, you can use it to enrich your garden soil, help houseplants thrive, or even start a new vegetable bed. Just mix it into the topsoil, and watch your plants flourish!
Let’s look at some different composting methods:
1. Trench Composting
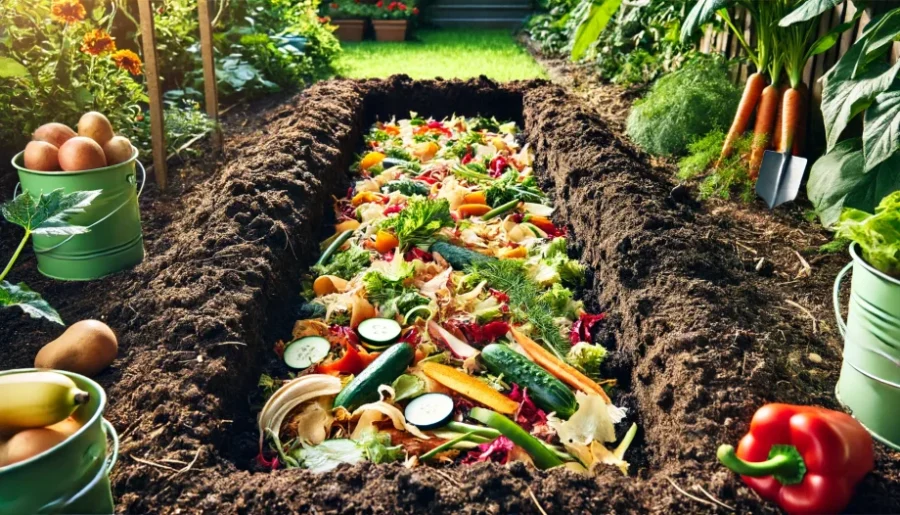
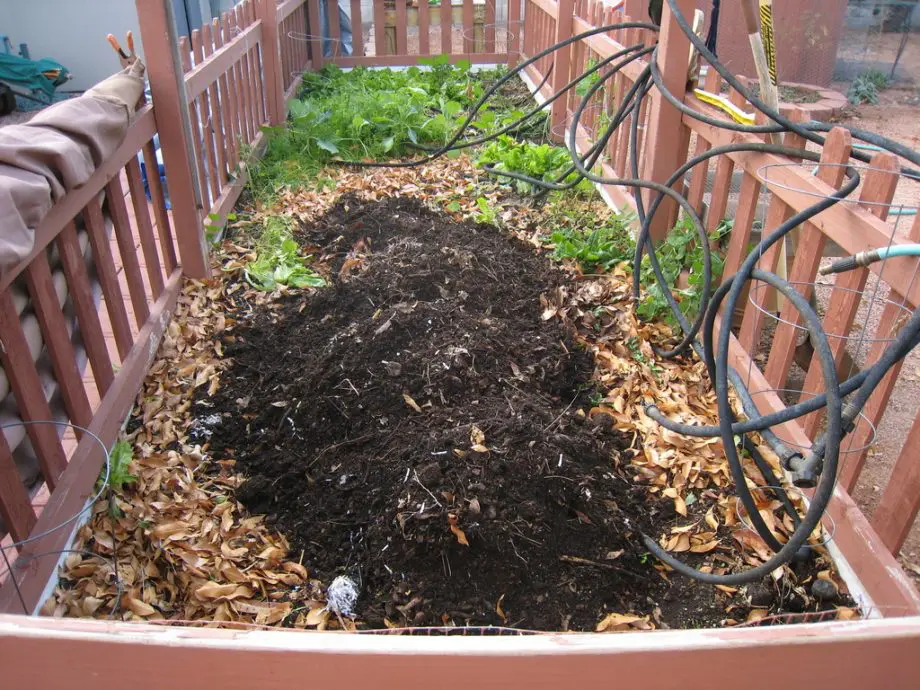
Trench composting is simple and great for garden rows. It involves digging a trench, tossing in your kitchen scraps, and covering it back up with soil.
Here’s a step-by-step guide to help you get started:
- Choose Your Location
Pick a spot in your garden where you plan to plant in the future. Trench composting works well in areas designated for future crops. - Dig the Trench
Dig a trench about 12 inches deep. The depth ensures that the scraps are well-covered and won’t attract pests. - Add Kitchen Scraps
Collect kitchen scraps like vegetable peels, fruit cores, and coffee grounds. Avoid meat, dairy, and oily foods as they can attract pests and take longer to decompose. - Cover with Soil
Once you’ve added your scraps, cover them with the soil you removed. This layer of soil helps to mask any odors and keeps pests away. - Rotate Trenches
If you have a large garden, consider rotating your trench locations. This way, different parts of your garden get enriched over time. - Wait and Plant
After a few months, the scraps will decompose, enriching the soil with nutrients. You can then plant directly above the trench.
Benefits of Trench Composting
- Minimal Effort: Unlike other methods, trench composting doesn’t require regular turning.
- Direct Enrichment: The decomposed scraps add nutrients directly to the soil where you’ll be planting.
- Pest Control: By covering the scraps with soil, you reduce the risk of attracting pests.
Tips for Successful Trench Composting
- Alternate Layers: For faster decomposition, you can alternate layers of green (nitrogen-rich) and brown (carbon-rich) materials.
- Avoid Woody Materials: Woody materials take longer to break down. Stick to softer, easily decomposable items.
- Plan Ahead: Since it takes a few months for the scraps to decompose, plan your trenches in advance of your planting schedule.
Trench composting is a straightforward and effective way to recycle kitchen scraps while improving your garden soil.
It’s especially useful if you’re looking for a low-maintenance composting method that fits seamlessly into your gardening routine.
2. Windrow Composting
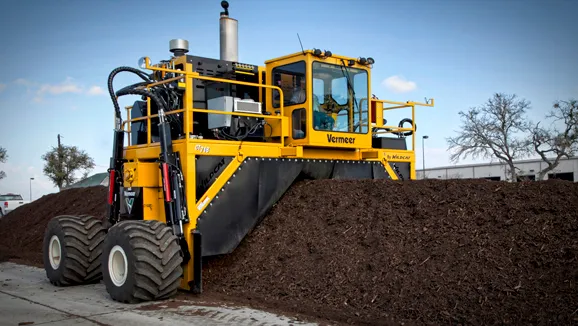
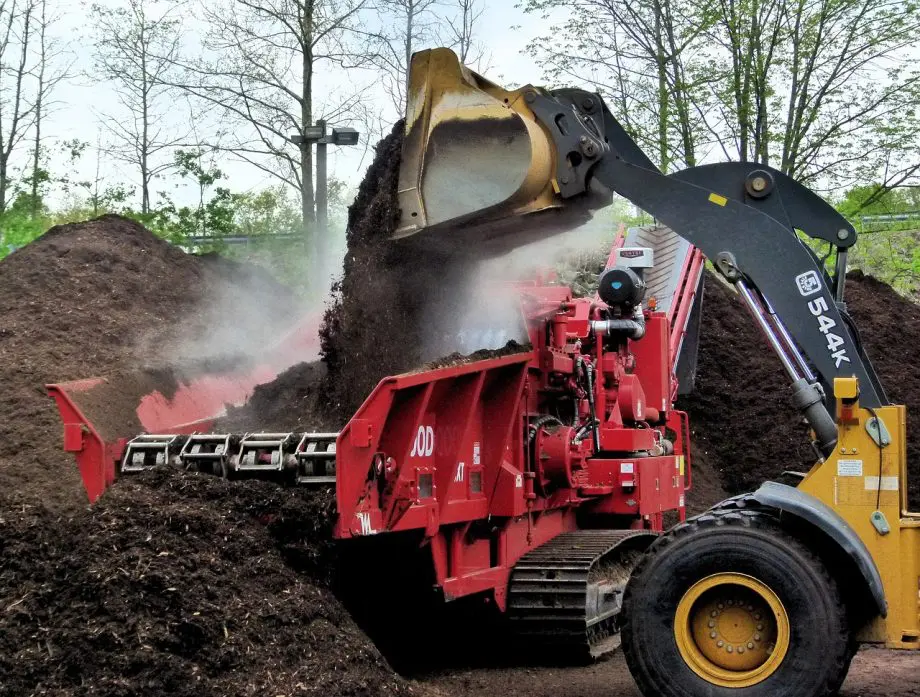
Windrow composting is usually done on a larger scale. Organic waste is piled in long rows (windrows) and turned regularly to aerate and speed up decomposition.
It’s a method often used by farms and municipalities. Here’s an in-depth look at how windrow composting works and its benefits.
How to Set Up Windrow Composting
- Select a Suitable Site
Choose a flat, well-drained area for your windrows. Ideally, the site should be accessible for equipment needed to turn the compost and manage the rows. Consider local regulations and proximity to water sources to prevent contamination. - Prepare the Ground
Clear the ground of any debris and, if necessary, create a slight slope to ensure proper drainage. Laying down a base layer of coarse materials like wood chips can help improve aeration and drainage. - Build the Windrows
Pile organic waste into long rows. Each windrow should be about 4-8 feet high and as wide as your turning equipment can handle. The length of the windrows can vary based on the amount of material and available space. - Maintain the Right Balance
Just like other composting methods, maintaining a balance of greens (nitrogen-rich materials) and browns (carbon-rich materials) is crucial. Typical materials include:- Greens: Grass clippings, food scraps, manure.
- Browns: Dry leaves, straw, wood chips.
- Monitor and Manage
Regularly check the temperature of the windrows. A temperature range of 135°F to 160°F is ideal for killing pathogens and weed seeds. If the pile is too hot, turn it more frequently. If it’s too cool, add more greens to boost nitrogen levels. - Turn the Windrows
Turning the windrows helps introduce oxygen and mix the materials, speeding up the decomposition process. Use a front-end loader, specialized windrow turner, or manual tools if the windrows are small. Turn the windrows every few days to maintain aeration. - Monitor Moisture Levels
Keep the compost moist but not waterlogged. The ideal moisture level is similar to a wrung-out sponge. Add water during dry periods and cover the windrows during heavy rains to maintain the right moisture balance.
Benefits of Windrow Composting
- Efficient Decomposition: Regular turning and aeration speed up the composting process, making it faster than static pile methods.
- Scalability: Windrow composting can handle large volumes of organic waste, making it suitable for farms and municipalities.
- Pathogen Control: The high temperatures achieved in windrows help kill pathogens and weed seeds, resulting in safer compost.
- Nutrient-Rich Compost: The final product is a nutrient-rich compost that can be used to improve soil health and fertility.
Challenges of Windrow Composting
- Space Requirement: This method requires a significant amount of space, making it less suitable for small-scale or urban composting.
- Labor and Equipment: Regular turning and monitoring require labor and potentially expensive equipment.
- Odor Management: If not managed properly, windrow composting can produce odors, so it’s important to maintain the right balance of materials and aeration.
Summary
Windrow composting is a practical and effective method for large-scale composting operations.
By following best practices and regularly managing the windrows, you can produce high-quality compost that benefits agricultural land, parks, and gardens.
This method leverages the natural decomposition process, turning organic waste into valuable soil amendments.
By following these guidelines, you’ll be able to implement windrow composting successfully, transforming large amounts of organic waste into beneficial compost.
3. Aerobic Composting
Aerobic composting requires oxygen. You’ll need to turn the pile regularly to keep air flowing, which helps the microbes break down the materials quickly. This method is fast but requires a bit of effort.
How to Set Up Aerobic Composting
- Choose a Suitable Location
Select a well-drained spot in your garden or yard for your compost pile or bin. Ensure it’s easily accessible for regular turning and monitoring. - Build or Buy a Compost Bin
While you can compost in an open pile, using a compost bin helps contain the materials and retain heat and moisture. Bins can be homemade or purchased from garden centers. - Layering the Materials
Start with a layer of coarse materials like small branches or straw at the bottom to improve aeration. Then, alternate layers of greens (nitrogen-rich materials) and browns (carbon-rich materials). Examples include:- Greens: Grass clippings, vegetable scraps, coffee grounds.
- Browns: Dry leaves, shredded newspaper, cardboard.
- Maintain Proper Moisture Levels
The compost pile should be as damp as a wrung-out sponge. Add water if it’s too dry and add dry materials if it’s too wet. Proper moisture levels are crucial for microbial activity. - Turn the Pile Regularly
Use a pitchfork or a compost turner to mix the compost pile every few days to ensure it remains aerobic. Turning the pile introduces oxygen, which speeds up the decomposition process and prevents odors. - Monitor the Temperature
Aerobic composting generates heat. Use a compost thermometer to check the internal temperature of the pile. The ideal range is between 135°F and 160°F. If the temperature drops, turn the pile to reintroduce oxygen and boost microbial activity. - Additions and Adjustments
Continuously add new materials in the proper balance of greens and browns. If the pile seems to slow down, check moisture levels, balance the material ratios, and ensure proper aeration.
Benefits of Aerobic Composting
- Rapid Decomposition: With regular turning and proper management, aerobic composting can produce finished compost in as little as two to three months.
- High-Quality Compost: The process results in rich, dark compost that is excellent for enriching garden soil.
- Pathogen Reduction: The high temperatures achieved in aerobic composting help kill weed seeds and pathogens, making the compost safe for use.
Challenges of Aerobic Composting
- Regular Maintenance: This method requires frequent turning and monitoring, which can be labor-intensive.
- Space Requirements: Aerobic composting needs sufficient space for a bin or pile and for turning the materials.
- Managing Odors: If not properly managed, the compost pile can produce unpleasant odors. Ensuring the right balance of materials and regular turning helps mitigate this issue.
Tips for Successful Aerobic Composting
- Chop Materials: Smaller pieces decompose faster, so chop larger materials before adding them to the pile.
- Monitor Moisture: Regularly check the moisture level and adjust as needed.
- Balanced Ingredients: Always maintain a good balance between greens and browns to support efficient decomposition.
- Avoid Certain Items: Refrain from adding meat, dairy, or oily foods to prevent attracting pests and causing odors.
Summary
Aerobic composting is an effective method for quickly turning organic waste into nutrient-rich compost.
By maintaining proper aeration, moisture levels, and material balance, you can produce high-quality compost that benefits your garden soil and plants.
Regular maintenance is key to ensuring the success of this composting method.
By following these steps and tips, you can make the most of aerobic composting and enjoy the rewards of rich, fertile soil for your garden. Happy composting!
4. Cold Composting
Cold composting is for the laid-back patient gardener. Just pile up your organic waste and let it decompose over time. It’s low maintenance but takes a year or more to produce compost.
How to Set Up Cold Composting
- Choose a Suitable Location
Select a spot in your garden that’s out of the way but still accessible. Cold composting doesn’t require frequent attention, so it can be placed in a less prominent area. - Start with a Base Layer
Begin with a layer of coarse materials such as small branches or straw. This base helps with drainage and aeration at the bottom of the pile. - Add Organic Waste
Continuously add kitchen scraps, garden clippings, and other organic waste to the pile. You can add materials such as:- Vegetable peels
- Fruit scraps
- Coffee grounds
- Grass clippings
- Dry leaves
- Shredded paper
- Maintain a Balance
While cold composting is more forgiving than hot composting, maintaining a balance of greens (nitrogen-rich materials) and browns (carbon-rich materials) helps ensure that the pile decomposes efficiently. Aim for about a 50/50 mix. - Minimize Turning
One of the benefits of cold composting is that it requires little to no turning. However, if you notice that the pile is becoming compacted, turning it occasionally can help aerate the materials. - Monitor Moisture Levels
Keep the compost pile moist but not waterlogged. If the pile becomes too dry, add some water. If it’s too wet, add more dry materials like leaves or straw to absorb the excess moisture. - Patience is Key
Cold composting is a slow process, often taking a year or more to produce finished compost. Be patient and let nature take its course. The final product will be a dark, crumbly compost rich in nutrients.
Benefits of Cold Composting
- Low Maintenance: This method requires minimal effort, making it ideal for busy or less active gardeners.
- Flexible Location: Since it doesn’t need frequent turning, you can place your compost pile in a less accessible part of your garden.
- Sustainable: Cold composting allows you to recycle a wide variety of organic waste, reducing your household’s overall waste.
Challenges of Cold Composting
- Slow Process: The primary drawback is the time it takes for the compost to mature. If you need compost quickly, this might not be the best method.
- Potential for Pests: Without regular turning and careful management, cold compost piles can attract pests. Ensure you cover food scraps well and avoid adding meat or dairy products.
- Less Control: You have less control over the composting process compared to methods like aerobic composting. The breakdown of materials is slower and more variable.
Tips for Successful Cold Composting
- Cover the Pile: Use a tarp or other cover to protect the pile from excessive rain, which can make it too wet, or from drying out completely.
- Layering: Adding layers of different materials helps to create pockets of air and encourages even decomposition.
- Add Soil: Sprinkling some garden soil or finished compost between layers can introduce beneficial microorganisms that aid in decomposition.
- Avoid Weeds: Don’t add weeds with seeds or diseased plants to prevent spreading them in your garden.
Summary
Cold composting is an easy and low-effort way to recycle your organic waste into valuable compost for your garden.
While it takes longer to produce finished compost, the minimal maintenance required makes it a great option for those who prefer a hands-off approach.
By following these tips, you can ensure that your cold composting efforts are successful and rewarding.
By embracing the slow and steady process of cold composting, you can turn your kitchen and garden waste into a rich, organic soil amendment with minimal effort.
5. Closed Bin Composting
Redmon 65 Gallon Outdoor Compost Bin with Snapping Lift Off Lid
Closed bin composting is neat and contained. It’s perfect for small spaces and urban gardeners.
These bins help manage odors and keep pests out while your compost cooks.
Here’s a detailed look at how to make the most of closed bin composting:
How to Set Up Closed Bin Composting
- Choose the Right Bin
Select a closed compost bin that suits your space and needs. There are various types, including plastic bins, tumblers, and even DIY options. Ensure the bin has a secure lid and adequate ventilation holes to allow airflow. - Find the Perfect Spot
Place your compost bin in a convenient location, preferably in a shaded area to prevent it from getting too hot. The spot should be easily accessible so you can add materials and monitor the compost regularly. - Layering the Materials
Start with a layer of coarse materials like small branches or straw at the bottom to help with drainage and airflow. Then, add layers of greens (nitrogen-rich materials) and browns (carbon-rich materials):- Greens: Vegetable scraps, fruit peels, coffee grounds.
- Browns: Dry leaves, shredded newspaper, cardboard.
- Maintain Moisture Levels
Keep the compost materials moist but not soggy. The consistency should be similar to a wrung-out sponge. If it becomes too dry, add water. If it’s too wet, add more dry materials to balance the moisture. - Regularly Turn the Compost
While not all closed bins require turning, it’s beneficial to aerate the materials periodically. If your bin is a tumbler, give it a few spins every few days. For other types of bins, use a compost turner or pitchfork to mix the materials. - Monitor and Maintain
Check the compost regularly to ensure it’s breaking down properly. Look out for any signs of imbalance, such as foul odors (indicating too much nitrogen) or slow decomposition (indicating too little nitrogen or moisture). Adjust the mix as needed.
Benefits of Closed Bin Composting
- Odor Control: Closed bins help manage odors effectively, making them suitable for urban settings where neighbors are close by.
- Pest Prevention: The secure lid and enclosed design keep pests like rodents and insects out, ensuring a cleaner composting process.
- Space Efficiency: These bins are compact and can fit into small spaces, ideal for patios, balconies, and small yards.
- Tidy Appearance: Closed bins keep your compost contained and out of sight, maintaining a neat and tidy garden or yard.
Challenges of Closed Bin Composting
- Limited Space: Closed bins have limited capacity, so they may not be suitable for large amounts of waste.
- Aeration Management: Ensuring proper airflow can be more challenging in a closed system. Regular turning or ensuring adequate ventilation is crucial.
- Moisture Control: Closed bins can sometimes retain too much moisture. Regularly checking and adjusting moisture levels is necessary to avoid soggy compost.
Tips for Successful Closed Bin Composting
- Chop Materials: Cut up larger items before adding them to the bin. Smaller pieces break down faster and more efficiently.
- Balance Your Greens and Browns: Maintain the right ratio of nitrogen to carbon materials to ensure efficient decomposition.
- Add Soil or Finished Compost: Occasionally add a handful of garden soil or finished compost to introduce beneficial microbes that aid in decomposition.
- Avoid Problematic Items: Refrain from adding meat, dairy, oily foods, and diseased plants to prevent pests and slow decomposition.
Summary
Closed bin composting is a practical and efficient way to recycle kitchen and garden waste in a neat, contained system.
It’s particularly well-suited for urban gardeners and those with limited space.
By following best practices for layering, moisture management, and aeration, you can produce high-quality compost to enrich your soil and support healthy plant growth.
By embracing closed bin composting, you can enjoy the benefits of composting in a clean, controlled environment, transforming your organic waste into valuable, nutrient-rich compost.
6. Bokashi Composting
All Seasons Indoor Composter Starter Kit – 5 Gallon Bokashi Compost Bin & Bag Of Dry Bokashi Bran
Bokashi composting uses anaerobic fermentation to break down kitchen waste, including meat and dairy which are typically avoided in traditional composting.
You need a special bin and bokashi bran. It’s a bit different from traditional composting and is great for indoor use.
Here’s a comprehensive guide to bokashi composting:
How Bokashi Composting Works
- Set Up Your Bokashi Bin
Obtain a bokashi bin, which is an airtight container designed for this type of composting. It usually comes with a spigot at the bottom to drain excess liquid, known as bokashi tea. - Add Bokashi Bran
Bokashi bran is a mixture of bran, molasses, and beneficial microbes. These microbes are essential for the fermentation process. Sprinkle a layer of bokashi bran at the bottom of the bin before adding any food waste. - Layer Your Kitchen Waste
Add kitchen scraps in layers. You can include almost all types of food waste, including meat, dairy, and cooked foods. After adding each layer, sprinkle a handful of bokashi bran over the waste to ensure even fermentation. - Compress and Seal
Compress the waste to remove as much air as possible and seal the bin tightly after each addition. The anaerobic environment is crucial for the fermentation process. - Drain the Liquid
Every few days, drain the liquid that collects at the bottom of the bin. This liquid, or bokashi tea, is a powerful fertilizer when diluted with water and can be used to nourish plants. - Fermentation Period
Allow the waste to ferment for about two weeks. During this time, the microbes will break down the organic material, reducing its volume and odor. - Bury or Compost the Fermented Waste
Once the fermentation process is complete, the waste will be pre-composted. It can be buried directly in the soil, where it will continue to break down and enrich the soil, or added to a traditional compost bin to complete the composting process.
Benefits of Bokashi Composting
- Handles All Food Waste: Unlike traditional composting, bokashi composting can process meat, dairy, and oily foods without attracting pests or causing odors.
- Space-Efficient: The process is ideal for small spaces and indoor environments, making it perfect for urban gardeners and apartment dwellers.
- Rapid Decomposition: The fermentation process is quick, taking only about two weeks to complete, after which the material is ready to be buried or further composted.
- Nutrient-Rich Fertilizer: The bokashi tea produced is a potent liquid fertilizer that can be diluted and used to boost plant growth.
Challenges of Bokashi Composting
- Requires Specialized Materials: You need a bokashi bin and bran, which may not be readily available in all areas.
- Regular Maintenance: The bin needs to be sealed tightly after each use and the liquid must be drained regularly.
- Fermented Waste Needs Further Processing: The waste needs to be buried or added to another compost system to fully decompose.
Tips for Successful Bokashi Composting
- Use High-Quality Bokashi Bran: Ensure you use a good quality bokashi bran with active microbes to facilitate effective fermentation.
- Keep the Bin Sealed: Always seal the bin tightly after adding waste to maintain the anaerobic environment.
- Dilute Bokashi Tea: When using bokashi tea as a fertilizer, dilute it at a ratio of 1:100 (bokashi tea to water) to avoid burning plants.
- Alternate Bins: If you produce a lot of food waste, consider using two bins in rotation. While one bin is fermenting, you can add fresh waste to the other.
Summary
Bokashi composting is a versatile and efficient method for managing kitchen waste, including items that are typically problematic for traditional composting.
By utilizing the fermentation process, bokashi composting transforms organic waste into a valuable resource for your garden.
With minimal space requirements and the ability to handle a wide variety of food scraps, it’s an excellent choice for indoor and urban composting.
By adopting bokashi composting, you can effectively recycle your kitchen waste into nutrient-rich compost, enriching your garden and reducing your environmental footprint.
7. Vermicomposting
Worm Factory® 360 US Made Composting System for Recycling Food Waste at Home
Vermicomposting is an eco-friendly method that uses worms to turn kitchen scraps into rich, nutrient-dense compost.
This method is particularly suitable for apartments or homes with limited space, as it can be done indoors with minimal odor and mess.
Here’s an expanded look at vermicomposting, including setup, benefits, and tips for success.
How Vermicomposting Works
- Setting Up a Worm Bin
- Choose the Right Bin: A suitable worm bin can be made of plastic or wood and should have a lid and ventilation holes. You can buy a commercial worm bin or make your own. The size of the bin depends on the amount of waste you generate.
- Prepare the Bedding: Start with a layer of bedding material such as shredded newspaper, cardboard, coconut coir, or peat moss. This bedding should be moist but not soggy.
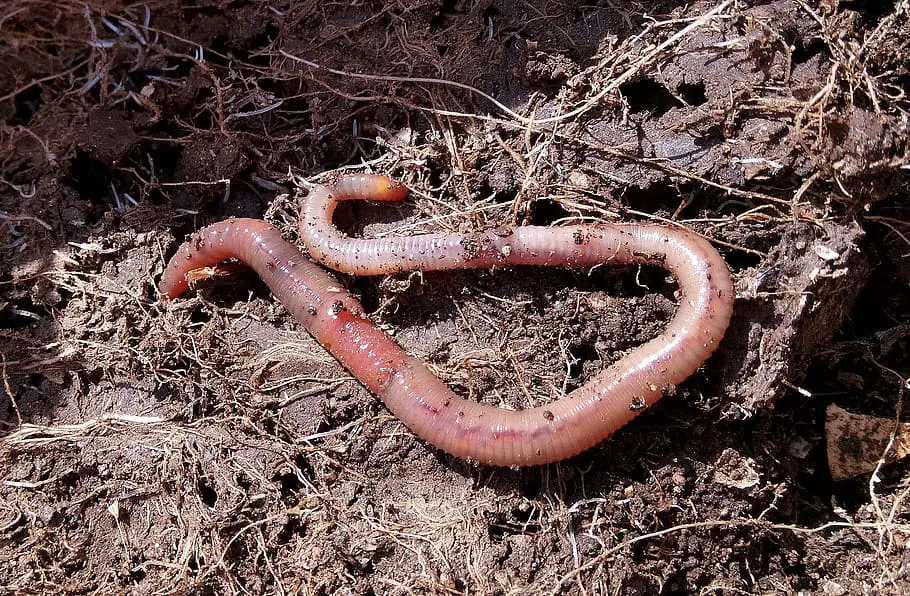
- Add Worms: Red wigglers (Eisenia fetida) are the best type of worms for composting. They thrive in the organic waste and are very efficient at breaking it down. You can purchase these worms online or from a gardening store.
- Feeding the Worms
- What to Feed: Worms can eat a variety of kitchen scraps, including fruit and vegetable peels, coffee grounds, tea bags, eggshells, and small amounts of bread or pasta.
- Avoid: Do not feed worms meat, dairy, oily foods, or large amounts of citrus and onions as these can attract pests and create unpleasant odors.
- How to Feed: Bury the food scraps under the bedding to avoid attracting flies. Feed the worms regularly, but don’t overfeed. If you notice uneaten food after a week, reduce the amount you’re giving them.
- Maintaining the Worm Bin
- Moisture and Temperature: Keep the bedding moist like a wrung-out sponge. If it gets too dry, add water. If it’s too wet, add more dry bedding. Maintain a temperature between 55°F and 77°F.
- Aeration: Ensure good airflow to prevent the bin from becoming anaerobic. Stir the contents occasionally to maintain aeration.
- Harvesting the Compost
- When to Harvest: After a few months, the bedding and food scraps will turn into dark, crumbly compost called worm castings, which are ready to be harvested.
- How to Harvest: Move the finished compost to one side of the bin and add fresh bedding and food to the other side. The worms will migrate to the new food source, allowing you to collect the finished compost easily.
Benefits of Vermicomposting
- Nutrient-Rich Castings: Worm castings are an excellent fertilizer, rich in nutrients and beneficial microbes that help plants thrive.
- Space Efficiency: Vermicomposting bins are compact and can fit in small spaces like under the kitchen sink or on a balcony.
- Low Odor: When managed properly, vermicomposting produces minimal odor, making it suitable for indoor use.
- Waste Reduction: This method helps reduce household waste by recycling kitchen scraps into valuable compost.
Challenges of Vermicomposting
- Temperature Sensitivity: Worms are sensitive to extreme temperatures. It’s important to keep the bin in a stable environment, away from direct sunlight or freezing temperatures.
- Maintenance: Regular feeding and monitoring are required to ensure the worms stay healthy and productive.
- Pest Control: While vermicomposting can be low-odor and clean, improper management can lead to pests like fruit flies. Burying food scraps and maintaining proper moisture levels help mitigate this issue.
Tips for Successful Vermicomposting
- Start Small: If you’re new to vermicomposting, start with a small bin and gradually increase the size as you become more comfortable with the process.
- Regular Monitoring: Check the bin regularly to ensure conditions are optimal. Look for signs of distress in the worms, such as escaping or sluggishness, which can indicate problems.
- Educate Yourself: Learn about the specific needs of your worms and the best practices for maintaining a healthy bin. There are many resources and communities online dedicated to vermicomposting.
Summary
Vermicomposting is a practical and efficient way to recycle kitchen scraps into nutrient-rich compost using worms.
It’s an excellent option for those with limited space and offers numerous benefits for both the gardener and the environment.
By following the setup and maintenance tips, you can successfully manage a worm bin and enjoy the rewards of high-quality compost for your plants.
By incorporating vermicomposting into your waste management routine, you can contribute to a more sustainable lifestyle while enhancing your garden’s soil health.
8. Worm Bin
VermiHut Plus 5-Tray Worm Compost Bin – Easy Setup and Sustainable Design
A worm bin is a specially designed container for vermicomposting, providing an ideal environment for worms to turn kitchen scraps into rich, nutrient-dense compost.
Worm bins can be kept indoors or outdoors, making them a versatile and fun way to compost with minimal odor and mess.
Here’s an expanded guide on setting up and maintaining a worm bin:
Setting Up a Worm Bin
- Choosing the Bin
- Material: Worm bins can be made of plastic or wood. Plastic bins are lightweight and easy to clean, while wood bins offer better breathability.
- Size: The size of the bin depends on the amount of waste you generate. A bin that’s about 18 inches deep, 24 inches wide, and 36 inches long is suitable for an average household.
- Ventilation: Ensure the bin has ventilation holes for airflow. Drill holes in the lid and sides if necessary to prevent the bin from becoming anaerobic.
- Preparing the Bedding
- Materials: Use materials like shredded newspaper, cardboard, coconut coir, or peat moss. These provide a habitat for the worms and help retain moisture.
- Moisture: The bedding should be moist but not soggy. Think of a wrung-out sponge as a good moisture level. If it’s too dry, add water; if it’s too wet, add more dry bedding.
- Adding the Worms
- Type of Worms: Red wigglers (Eisenia fetida) are the best choice for composting. They thrive in decomposing organic materials and reproduce quickly.
- Amount: For a new bin, start with about 1 pound of worms (roughly 1,000 worms). They will multiply as they settle into their new environment.
Feeding the Worms
 Uncle Jim’s Worm Farm Red Wiggler Composting Worms
- What to Feed
- Kitchen Scraps: Feed the worms vegetable peels, fruit scraps, coffee grounds, tea bags, crushed eggshells, and small amounts of bread or pasta.
- Avoid: Do not feed worms meat, dairy, oily foods, or large amounts of citrus and onions as these can attract pests and create unpleasant odors.
- How to Feed
- Burying Scraps: Bury the food scraps under the bedding to prevent attracting flies and other pests. This also helps control odors.
- Frequency: Feed the worms regularly, but avoid overfeeding. If uneaten food remains after a week, reduce the amount you’re giving them.
Maintaining the Worm Bin
- Moisture and Temperature
- Moisture: Keep the bedding moist like a wrung-out sponge. Adjust moisture levels by adding water or dry bedding as needed.
- Temperature: Maintain a temperature between 55°F and 77°F. Worms are sensitive to extreme temperatures, so keep the bin in a stable environment away from direct sunlight or freezing conditions.
- Aeration
- Stirring: Occasionally stir the contents of the bin to ensure good airflow and prevent compaction. This helps maintain an aerobic environment.
Harvesting the Compost
- When to Harvest
- Mature Compost: After a few months, the bedding and food scraps will transform into dark, crumbly compost known as worm castings.
- Migration Method: Move the finished compost to one side of the bin and add fresh bedding and food to the other side. The worms will migrate to the new food source, allowing you to easily collect the finished compost.
- Tray Method if you bought a worm bin with the tray system you will add a fresh tray with bedding and food on top of the old one. The worms will migrate to the new tray allowing you to harvest worm castings from the lower tray.
- Using the Compost
- Application: Use the worm castings as a top dressing for houseplants, mix it into garden soil, or make compost tea to feed plants.
Benefits of a Worm Bin
- Nutrient-Rich Compost: Worm castings are rich in nutrients and beneficial microbes, enhancing soil health and plant growth.
- Space Efficiency: Worm bins are compact and can fit in small spaces like under the kitchen sink or on a balcony.
- Low Odor: Properly managed worm bins produce minimal odor, making them suitable for indoor use.
- Sustainability: Vermicomposting reduces kitchen waste, diverting it from landfills and turning it into valuable compost.
Challenges of a Worm Bin
- Temperature Sensitivity: Worms require stable temperatures to thrive. Extreme heat or cold can harm them.
- Maintenance: Regular feeding and monitoring are necessary to ensure the worms’ health and productivity.
- Pest Control: While vermicomposting is generally low-odor, improper management can attract pests. Burying food scraps and maintaining proper moisture levels help mitigate this issue.
Tips for Successful Worm Bin Composting
- Start Small: If you’re new to vermicomposting, start with a small bin and gradually increase the size as you become more comfortable.
- Regular Monitoring: Check the bin regularly to ensure optimal conditions. Look for signs of distress in the worms, such as escaping or sluggishness, which can indicate problems.
- Educate Yourself: Learn about the specific needs of your worms and the best practices for maintaining a healthy bin. There are many resources and communities online dedicated to vermicomposting.
Summary
A worm bin is an excellent way to compost kitchen scraps efficiently and sustainably, even in small spaces.
By providing a controlled environment for worms to thrive, you can produce high-quality compost while reducing your household waste.
With minimal odor and mess, worm bins are perfect for indoor or outdoor use, making composting accessible to everyone.
By integrating a worm bin into your composting routine, you can enjoy the benefits of nutrient-rich compost and contribute to a greener, more sustainable lifestyle.
9. Aerated Static Pile Composting
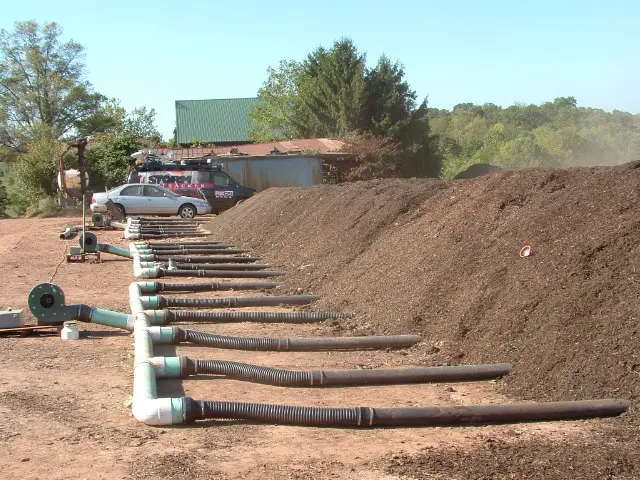
Aerated static pile composting uses pipes or other systems to aerate a large pile of compost, reducing the need for frequent turning.
It’s efficient and great for larger composting projects. Here’s an in-depth guide on setting up and managing an aerated static pile composting system:
How Aerated Static Pile Composting Works
- Select a Suitable Site
Choose a location with good drainage that can accommodate the size of your compost pile. This method is ideal for larger spaces such as farms, community gardens, or municipal composting sites. - Prepare the Aeration System
- Pipes: Lay perforated pipes at the bottom of the compost pile site. These pipes will provide the necessary airflow to the pile.
- Blowers: In larger setups, use blowers connected to the pipes to force air through the compost pile. For smaller setups, natural airflow can suffice.
- Build the Pile
- Base Layer: Start with a layer of coarse materials such as wood chips or straw. This base helps with drainage and prevents the pipes from getting clogged.
- Layering: Pile organic waste on top of the base layer, alternating between green (nitrogen-rich) and brown (carbon-rich) materials. Ensure the pile is uniform and not too compacted.
- Cover the Pile
- Insulation: Cover the pile with a layer of finished compost, straw, or burlap. This helps retain heat and moisture, essential for the composting process.
- Protection: If the pile is exposed to heavy rain, consider covering it with a tarp to prevent excess moisture.
- Monitor the Process
- Temperature: Use a compost thermometer to regularly check the temperature of the pile. Ideal temperatures range from 135°F to 160°F, which is sufficient to kill pathogens and weed seeds.
- Moisture: Maintain the moisture content at a level similar to a wrung-out sponge. If the pile is too dry, add water. If it’s too wet, add more dry materials like straw or sawdust.
Benefits of Aerated Static Pile Composting
- Efficiency: This method significantly reduces the need for manual turning, saving time and labor.
- Scalability: Ideal for large-scale composting operations, capable of handling high volumes of organic waste.
- Pathogen Control: The high temperatures achieved in the pile help kill pathogens and weed seeds, producing safer compost.
- Consistent Results: The controlled aeration and moisture levels lead to more consistent and quicker decomposition.
Challenges of Aerated Static Pile Composting
- Initial Setup: The initial setup, especially for large-scale operations, can be complex and require investment in equipment like pipes and blowers.
- Space Requirements: This method requires a substantial amount of space, making it less suitable for small-scale or urban composting.
- Regular Monitoring: Despite reducing manual turning, regular monitoring of temperature and moisture levels is essential to maintain the composting process.
Tips for Successful Aerated Static Pile Composting
- Proper Layering: Ensure the compost materials are layered correctly to promote efficient decomposition.
- Regular Monitoring: Keep a close eye on temperature and moisture levels to make necessary adjustments promptly.
- Maintenance of Equipment: Regularly check and maintain the aeration system to ensure it functions correctly.
- Cover the Pile: Use insulating materials to maintain consistent temperature and moisture levels, especially in varying weather conditions.
Summary
Aerated static pile composting is an effective method for large-scale composting projects, providing efficient decomposition with minimal manual labor.
By setting up an appropriate aeration system and regularly monitoring the pile, you can produce high-quality compost to enhance soil fertility and structure.
By implementing aerated static pile composting, you can manage large volumes of organic waste efficiently and sustainably, creating nutrient-rich compost for agricultural or landscaping use.
10. Heap Composting
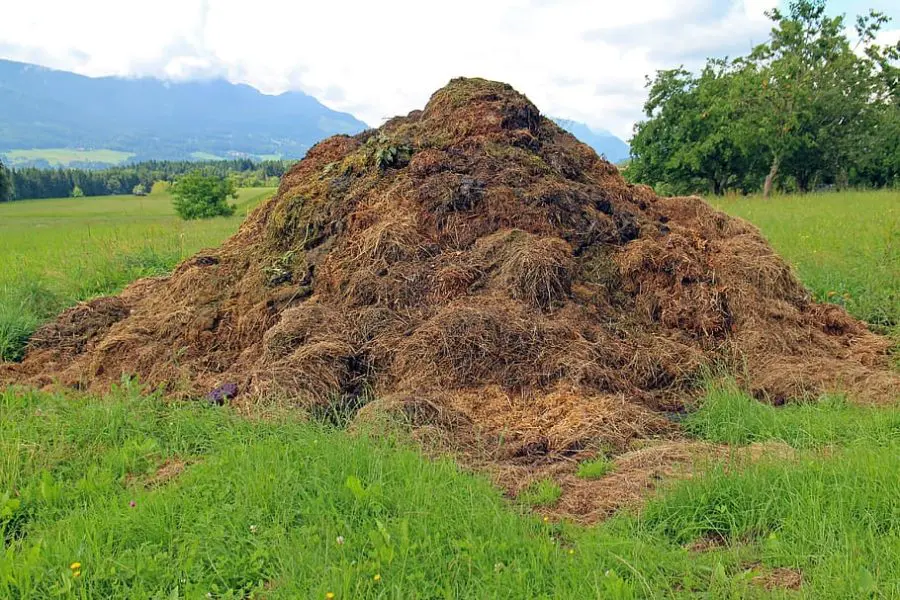
Heap composting is the traditional and straightforward method of composting, where organic materials are piled up in a corner of your yard and left to decompose naturally.
This method is accessible and doesn’t require any special equipment or bins, making it ideal for gardeners looking for a simple composting solution. Turn it occasionally to speed things up.
Here’s an expanded guide on heap composting:
How Heap Composting Works
- Choose a Suitable Location
Select a spot in your yard that’s out of the way but easily accessible. Ideally, the area should have good drainage and be close to your garden for convenience. - Build the Heap
- Base Layer: Start with a base layer of coarse materials like small branches or straw. This helps with aeration and drainage.
- Layering Materials: Add layers of green (nitrogen-rich) and brown (carbon-rich) materials. Greens include kitchen scraps, grass clippings, and coffee grounds, while browns include dry leaves, cardboard, and straw.
- Add Organic Waste Regularly
Continuously add kitchen scraps, garden waste, and other organic materials to the pile. Ensure you mix the materials to maintain a good balance of greens and browns. - Moisture Management
Keep the heap moist, similar to a wrung-out sponge. If the heap is too dry, add water. If it’s too wet, add more dry materials to absorb excess moisture. - Turn the Pile Occasionally
Use a pitchfork or shovel to turn the pile every few weeks. This aerates the compost, speeding up the decomposition process and helping to prevent odors.
Benefits of Heap Composting
- Simplicity: No need for special bins or equipment. Just pile up your organic waste and let nature do the work.
- Scalability: Can handle large volumes of organic waste, making it suitable for both small and large gardens.
- Low Cost: Since it doesn’t require any purchased materials or structures, heap composting is cost-effective.
Challenges of Heap Composting
- Pest Attraction: Open heaps can attract pests like rodents and insects if not properly managed.
- Odor Control: Without proper balance and aeration, the heap can develop unpleasant odors.
- Time and Space: Heap composting can take several months to a year to produce finished compost and requires ample space.
Tips for Successful Heap Composting
- Chop Materials: Smaller pieces decompose faster. Chop larger garden waste and kitchen scraps before adding them to the heap.
- Balance Greens and Browns: Ensure a good mix of nitrogen-rich greens and carbon-rich browns to promote efficient decomposition.
- Cover the Heap: Use a tarp or other covering to protect the heap from excessive rain, which can make it too wet, or from drying out completely.
- Monitor Moisture: Regularly check the moisture level of the heap and adjust as needed to maintain optimal conditions.
Summary
Heap composting is a classic and accessible method for turning organic waste into nutrient-rich compost.
By layering greens and browns, maintaining moisture, and occasionally turning the pile, you can create high-quality compost to enrich your garden soil.
By adopting heap composting, you can effectively recycle your organic waste and contribute to a more sustainable gardening practice.
11. Sheet Composting and Lasagna Composting
Sheet composting and lasagna composting are two methods that simplify the composting process by allowing organic materials to decompose directly on the garden bed.
These methods enhance soil fertility without the need for traditional compost bins or piles. Here’s a detailed look at each method:
Sheet Composting
Sheet composting, also known as sheet mulching, is akin to laying a mulch blanket over your garden.
This method involves spreading organic materials over the soil surface and allowing them to decompose in place. Here’s how to do it:
How to Set Up Sheet Composting:
- Prepare the Area
- Clear the Soil: Remove any large weeds or plants from the area where you plan to sheet compost.
- Moisten the Soil: Lightly water the soil to help kick-start the decomposition process.
- Layer Organic Materials
- Base Layer: Start with a layer of cardboard or several sheets of newspaper. This layer helps suppress weeds and provides a slow-release carbon source.
- Add Organic Matter: Pile organic materials on top, such as grass clippings, leaves, straw, and kitchen scraps. The layers should be a few inches thick.
- Cover and Maintain
- Top Layer: Add a final layer of compost or soil to help with decomposition and to weigh down the materials below.
- Water and Wait: Water the layers thoroughly and let them sit. Over time, the materials will break down, enriching the soil beneath.
Benefits of Sheet Composting:
- Weed Suppression: The initial layer of cardboard or newspaper helps prevent weeds from growing.
- Soil Enrichment: As the materials decompose, they improve soil structure and fertility.
- Low Maintenance: This method requires minimal effort once set up, as the materials break down naturally over time.
Challenges of Sheet Composting:
- Initial Setup: Preparing and layering the materials can be labor-intensive.
- Time: It takes several months for the materials to fully decompose and enrich the soil.
Lasagna Composting
Lasagna composting, also known as sheet layering or composting in place, involves creating a compost pile directly on the garden bed in layers, similar to making lasagna.
This method creates rich, fertile soil beds without the need for traditional composting. Here’s how to do it:
How to Set Up Lasagna Composting:
- Prepare the Base
- Mark the Area: Define the area where you want to create your lasagna bed.
- Base Layer: Lay down a layer of cardboard or newspaper over the marked area. This helps suppress weeds and serves as the base layer.
- Layering Materials
- First Layer: Add a layer of coarse materials like straw or small branches for drainage.
- Second Layer: Add a layer of green materials such as kitchen scraps, fresh grass clippings, or coffee grounds.
- Third Layer: Add a layer of brown materials like dried leaves, shredded paper, or cardboard.
- Repeat and Build
- Alternate Layers: Continue adding layers, alternating between greens and browns until the pile is about 18-24 inches high.
- Top Layer: Finish with a layer of compost or soil to help kick-start the decomposition process.
- Maintain the Bed
- Water Regularly: Keep the layers moist but not soggy. Proper moisture levels are crucial for decomposition.
- Cover: Optionally, cover the bed with a tarp or straw to retain moisture and heat.
Benefits of Lasagna Composting:
- Rich Soil: The layered approach creates nutrient-dense soil, ideal for planting.
- Weed Suppression: The base layer of cardboard or newspaper helps keep weeds at bay.
- Reduced Labor: Unlike traditional composting, there’s no need to turn the pile regularly.
Challenges of Lasagna Composting:
- Space Requirements: This method requires a dedicated garden space.
- Time: It can take several months for the materials to fully break down and be ready for planting.
Summary
Both sheet composting and lasagna composting are effective methods for enriching garden soil with minimal effort.
By layering organic materials directly on the garden bed, these methods provide a sustainable way to improve soil health and fertility.
Choose the method that best fits your garden needs and available space, and enjoy the benefits of nutrient-rich compost.
By incorporating these composting methods into your gardening routine, you can enhance soil quality, reduce waste, and enjoy a healthier garden.
12. Plastic Composter
Garden Compost Bin BPA Free-80 Gallon Large Compost Bin
Plastic composters are bins made from durable plastic. They’re easy to manage and these bins help control the composting process by retaining heat and moisture, creating optimal conditions for decomposition.
Here’s a detailed guide on using plastic composters, including setup, benefits, and tips for success.
How Plastic Composters Work
- Choosing a Plastic Composter
- Types: Plastic composters come in various shapes and sizes, including upright bins, tumblers, and stackable units. Choose one that fits your space and composting needs.
- Features: Look for features such as secure lids to keep pests out, ventilation holes for airflow, and easy access points for adding waste and harvesting compost.
- Setting Up the Composter
- Location: Place the composter in a convenient spot with good drainage, preferably in a partially shaded area to prevent overheating.
- Base Layer: Start with a layer of coarse materials like small branches or straw at the bottom of the bin. This helps with drainage and aeration.
- Adding Organic Waste
- Greens and Browns: Add kitchen scraps, garden waste, and other organic materials, alternating between greens (nitrogen-rich) and browns (carbon-rich). Greens include vegetable peels, fruit scraps, and coffee grounds. Browns include dry leaves, cardboard, and shredded paper.
- Layering: Layer the materials to create a balanced mix that promotes efficient decomposition.
- Maintaining the Compost
- Moisture: Keep the compost moist but not soggy. The consistency should be like a wrung-out sponge. If the compost is too dry, add water. If it’s too wet, add more dry materials.
- Turning: Some plastic composters are designed to be turned or rotated (tumblers). Turn the compost regularly to aerate it and speed up decomposition. For upright bins, use a compost aerator or garden fork to mix the materials periodically.
Benefits of Plastic Composters
- Controlled Environment: Plastic bins help retain heat and moisture, creating optimal conditions for composting.
- Pest Prevention: Secure lids and durable construction keep pests like rodents and insects out of the compost.
- Ease of Use: Plastic composters are easy to manage, with features that simplify adding waste and accessing finished compost.
- Space Efficiency: These bins come in various sizes, making them suitable for both small and large spaces.
Challenges of Plastic Composters
- Limited Capacity: Depending on the size, plastic composters may have limited capacity compared to open piles or larger systems.
- Maintenance: Regular monitoring and turning are required to ensure proper aeration and decomposition.
- Durability: While plastic composters are generally durable, exposure to extreme weather conditions over time can cause wear and tear.
Tips for Successful Composting with Plastic Bins
- Balance Your Inputs: Maintain a good ratio of greens to browns to support efficient decomposition and prevent odors.
- Chop Materials: Smaller pieces decompose faster, so chop or shred larger items before adding them to the bin.
- Monitor Conditions: Regularly check moisture and temperature levels to ensure the composting process is progressing well.
- Add Soil or Finished Compost: Occasionally add a handful of soil or finished compost to introduce beneficial microbes that aid in decomposition.
Summary
Plastic composters provide a convenient and effective way to manage organic waste and produce nutrient-rich compost.
By maintaining the right balance of materials and regularly turning the compost, you can create high-quality compost to enrich your garden soil.
By incorporating a plastic composter into your composting routine, you can enjoy the benefits of a controlled composting environment, turning kitchen scraps and garden waste into valuable compost for your plants.
13. Concrete Bin
Concrete bins are sturdy and pest-resistant. They’re great for large amounts of compost and offer durability that lasts for years.
This makes them a great choice for serious composters and larger operations.
Here’s an expanded guide on using concrete bins for composting:
How Concrete Bins Work
- Choosing the Site
- Location: Select a well-drained, level area in your garden or yard. Ensure the site is accessible for adding materials and turning the compost.
- Size: Concrete bins can be custom-built to fit your space and composting needs. They are typically larger than plastic bins, making them ideal for handling significant volumes of waste.
- Building the Concrete Bin
- Design: A typical concrete bin has three sides with an open front or a removable front panel for easy access. The back and sides are built from concrete blocks or poured concrete, providing a sturdy structure.
- Foundation: Ensure a solid foundation to support the weight of the compost and the concrete structure. This could be a concrete slab or compacted gravel.
- Adding Organic Waste
- Layering: Start with a base layer of coarse materials like small branches or straw to facilitate drainage. Then, add layers of green (nitrogen-rich) and brown (carbon-rich) materials. Greens include kitchen scraps, grass clippings, and coffee grounds. Browns include dry leaves, cardboard, and straw.
- Mixing: For best results, mix the materials as you add them to promote even decomposition.
- Maintaining the Compost
- Moisture: Keep the compost pile moist but not waterlogged. The consistency should be similar to a wrung-out sponge. Add water if the compost is too dry and more dry materials if it’s too wet.
- Turning: Use a garden fork or a compost turner to mix the compost regularly. This aerates the pile, speeding up decomposition and preventing odors.
Benefits of Concrete Bins
- Durability: Concrete bins are extremely durable and can last for decades with minimal maintenance.
- Pest Resistance: The sturdy structure prevents pests like rodents from accessing the compost.
- Large Capacity: Ideal for large-scale composting, concrete bins can handle significant volumes of organic waste.
- Thermal Mass: Concrete retains heat, helping to maintain optimal temperatures for composting even in cooler climates.
Challenges of Concrete Bins
- Initial Cost and Labor: Building a concrete bin requires more investment and labor upfront compared to plastic bins or open heaps.
- Immobility: Once built, concrete bins are not easily moved, so it’s essential to choose the location carefully.
- Aeration Management: Ensuring proper airflow can be more challenging in a large, enclosed structure. Regular turning is essential to maintain aerobic conditions.
Tips for Successful Composting with Concrete Bins
- Balance Greens and Browns: Maintain a proper ratio of nitrogen-rich greens to carbon-rich browns to facilitate efficient decomposition.
- Monitor Conditions: Regularly check moisture and temperature levels. Adjust as needed to maintain optimal conditions for composting.
- Use Multiple Bins: Consider a multi-bin system (e.g., three-bin setup) to manage different stages of composting. This allows for continuous composting and easy rotation of materials.
- Cover the Pile: Use a tarp or lid to protect the compost from excessive rain, which can make it too wet, or from drying out completely.
Summary
Concrete bins are a highly durable and effective solution for large-scale composting.
By providing a stable and pest-resistant environment, these bins can help you manage significant volumes of organic waste and produce high-quality compost for your garden.
Regular maintenance and proper layering of materials are key to successful composting with concrete bins.
By incorporating concrete bins into your composting routine, you can handle large amounts of organic waste efficiently, producing nutrient-rich compost that enhances soil health and plant growth.
14. Green Cone Food Composters
Green Cone Solar Waste Digester – Compost Bin: Set of 2
A green cone is a solar-powered composter designed to handle food waste efficiently.
Partially buried in the ground, it uses solar heat to speed up the decomposition process.
This system is particularly suitable for processing kitchen waste, including meat and dairy, which are typically challenging for traditional composting methods.
Here’s an expanded guide on using green cone food composters:
How Green Cone Food Composters Work
- Choosing the Site
- Location: Select a sunny spot in your garden where the green cone can receive maximum sunlight. Adequate sunlight is crucial for the solar-powered decomposition process.
- Soil Drainage: Ensure the site has good drainage. Avoid areas where water tends to pool, as excess moisture can hinder the composting process.
- Installation
- Digging the Hole: Dig a hole about 24 inches deep and 28 inches wide. This depth ensures that the lower basket of the green cone is completely buried.
- Positioning the Cone: Place the green cone into the hole with the basket below ground level and the cone above ground. Backfill the hole with soil, securing the cone in place.
- Adding Waste
- Types of Waste: The green cone can handle all types of kitchen waste, including vegetable scraps, fruit peels, meat, fish, dairy products, and cooked food.
- No Yard Waste: Avoid adding garden waste or large quantities of paper and cardboard, as the green cone is specifically designed for food waste.
- Maintaining the Composter
- Moisture Management: Ensure the green cone remains moist but not waterlogged. The lid should be kept closed to maintain the correct moisture balance and to keep pests out.
- Solar Heat: The transparent upper cone allows sunlight to enter, creating a greenhouse effect that speeds up decomposition. Make sure the cone remains in a sunny spot for optimal performance.
Benefits of Green Cone Food Composters
- Efficient Decomposition: The solar-powered system accelerates the breakdown of organic waste, including difficult items like meat and dairy.
- Pest Resistance: The design and partial burial of the green cone help keep pests and rodents out, making it a hygienic composting option.
- Minimal Maintenance: Once installed, the green cone requires minimal intervention. Simply add waste and ensure it remains in a sunny location.
- Eco-Friendly: The green cone reduces household waste sent to landfills, converting it into valuable soil nutrients.
Challenges of Green Cone Food Composters
- Initial Installation: Digging the hole and setting up the green cone requires some effort and proper site selection.
- Limited Capacity: The green cone is designed for kitchen waste and may not be suitable for large quantities of garden waste.
- Dependency on Sunlight: The efficiency of the green cone relies heavily on sunlight. In areas with limited sun, the decomposition process may slow down.
Tips for Successful Composting with Green Cones
- Regular Use: Continuously add kitchen waste to keep the decomposition process active. Avoid letting the cone become too full before adding new waste.
- Monitor Moisture Levels: Check the moisture levels occasionally. If the contents appear too dry, add a small amount of water. If too wet, ensure the cone is not in a waterlogged area.
- Winter Care: In colder climates, the decomposition process may slow down in winter. Continue adding waste, and the process will resume full speed as temperatures rise.
Summary
Green cone food composters offer an efficient and eco-friendly solution for managing kitchen waste, using solar heat to accelerate decomposition.
By installing a green cone in a sunny, well-drained spot, you can effectively reduce household waste and enrich your garden soil with minimal effort.
By incorporating a green cone food composter into your composting routine, you can handle a wide range of kitchen waste efficiently, contributing to a sustainable and environmentally friendly lifestyle.
16. Outdoor Composters
Outdoor composters come in many forms, from simple piles to elaborate bins and tumblers.
They cater to different needs and preferences for managing yard and kitchen waste.
Each type offers unique advantages and considerations. Here’s a detailed look at the different types of outdoor composters and how to choose the best one for your needs.
Types of Outdoor Composters
- Compost Piles
- Description: The simplest form of outdoor composting, where organic waste is heaped in a pile directly on the ground.
- Benefits: No cost, easy to start, and can handle large volumes of waste.
- Challenges: Requires regular turning, can attract pests, and might produce odors if not managed properly.
- Compost Bins
- Description: Enclosed containers that hold composting materials, available in plastic, wood, or metal.
- Benefits: Contain waste neatly, reduce pest problems, and help retain moisture and heat.
- Challenges: Limited capacity compared to piles, and some bins require manual turning.
- Compost Tumblers
- Description: Enclosed drums that can be rotated to mix the composting materials.
- Benefits: Easy to turn and aerate, speeds up the composting process, and reduces odor and pest issues.
- Challenges: Higher initial cost and limited capacity compared to piles or larger bins.
- Wire and Wooden Bins
- Description: Simple structures made from wire mesh or wooden slats, allowing for good airflow.
- Benefits: Inexpensive, easy to build, and provide good aeration.
- Challenges: Less durable than commercial bins and may require more frequent monitoring and maintenance.
- Composting Trenches and Pits
- Description: Organic waste is buried in trenches or pits in the garden.
- Benefits: Very low maintenance, enriches soil directly, and minimizes odor.
- Challenges: Not suitable for large volumes of waste and takes longer for materials to decompose.
How to Choose the Best Outdoor Composter
- Assess Your Needs
- Volume of Waste: Consider the amount of kitchen and yard waste you generate. Larger families or avid gardeners may need a system with a greater capacity.
- Space Availability: Choose a composter that fits your available outdoor space. Smaller yards might benefit from compact tumblers or bins, while larger areas can accommodate piles or multiple bins.
- Ease of Use
- Maintenance: If you prefer low-maintenance options, consider compost piles, trenches, or automated tumblers that require less frequent turning.
- Accessibility: Ensure the composter is easy to access for adding waste and turning the compost.
- Pest Control
- Secure Bins: Enclosed bins and tumblers are effective at keeping pests like rodents and insects out.
- Location: Place your composter away from your home and any areas where pests are likely to be a problem.
- Climate Considerations
- Weather Exposure: Choose durable materials that can withstand your local climate, whether it’s heavy rain, intense sunlight, or freezing temperatures.
- Heat Retention: Some composters are designed to retain heat better, which can be beneficial in cooler climates to speed up decomposition.
Tips for Successful Outdoor Composting
- Balance Greens and Browns: Maintain a good ratio of nitrogen-rich greens (like kitchen scraps and grass clippings) to carbon-rich browns (like dry leaves and cardboard) to support efficient decomposition.
- Turn the Compost: Regularly turning the compost helps aerate the pile, speeding up the decomposition process and preventing odors.
- Monitor Moisture Levels: Keep the compost moist but not waterlogged. If it’s too dry, add water; if it’s too wet, add more dry materials.
- Additives: Occasionally add a handful of garden soil or finished compost to introduce beneficial microbes.
Summary
Outdoor composters offer a practical and efficient way to recycle organic waste and create nutrient-rich compost for your garden.
By choosing the right type of composter and following best practices, you can turn kitchen and yard waste into valuable soil amendments, supporting a healthier and more sustainable garden.
By integrating outdoor composters into your gardening routine, you can manage organic waste effectively and enjoy the benefits of rich, fertile compost.
17. Compost Tumblers
VIVOSUN Outdoor Tumbling Composter Dual Rotating Batch Compost Bin
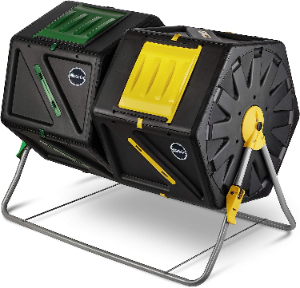
Compost tumblers are enclosed containers designed to make composting more efficient and user-friendly.
By allowing you to easily rotate the container, they provide aeration and mix the composting materials, speeding up the decomposition process.
Here’s a comprehensive guide on compost tumblers:
How Compost Tumblers Work
- Design and Structure
- Enclosed Container: Compost tumblers are typically cylindrical containers mounted on a support frame that allows them to be rotated. This design keeps the composting materials enclosed, which helps control moisture and temperature.
- Aeration: The tumblers often have built-in aeration vents or fins to ensure that air flows through the compost, which is essential for aerobic decomposition.
- Setup and Placement
- Location: Place the tumbler in a convenient location with good drainage and access to sunlight, as heat aids the composting process.
- Initial Load: Start with a mix of green (nitrogen-rich) and brown (carbon-rich) materials. Greens include kitchen scraps and grass clippings, while browns include dry leaves and cardboard. Aim for a balanced mix to promote efficient composting.
- Operation
- Filling: Add organic waste to the tumbler as it becomes available. Ensure you maintain a good balance of greens and browns.
- Rotation: Rotate the tumbler regularly, ideally every few days. This action mixes the materials and introduces oxygen, which accelerates the decomposition process.
Benefits of Compost Tumblers
- Convenience: The primary advantage of compost tumblers is their ease of use. Regular rotation requires minimal effort compared to manually turning a traditional compost pile.
- Speed: Compost tumblers can produce finished compost much faster than traditional methods, often within a few weeks to a couple of months.
- Pest Control: The enclosed design helps keep pests such as rodents and insects out, reducing the likelihood of unwanted visitors and odors.
- Odor Management: Proper aeration and enclosed design help manage odors effectively, making tumblers suitable for urban and suburban settings.
Challenges of Compost Tumblers
- Capacity: Tumblers generally have a limited capacity compared to open piles or larger bins, which might not be suitable for large quantities of waste.
- Initial Cost: Compost tumblers tend to be more expensive than other composting methods, such as bins or piles.
- Effort for Heavy Loads: When fully loaded, larger tumblers can be heavy and require more effort to rotate.
Tips for Successful Composting with Tumblers
- Balance Materials: Always maintain a proper balance of green and brown materials to ensure efficient decomposition. Too much of one type can slow down the process or cause odors.
- Chop Materials: Cut or shred larger pieces of organic waste before adding them to the tumbler. Smaller pieces decompose faster and more evenly.
- Monitor Moisture: Keep the compost moist but not too wet. The contents should feel like a damp sponge. If the compost is too dry, add water. If it’s too wet, add more dry materials like leaves or paper.
- Regular Rotation: Rotate the tumbler regularly to mix the contents and introduce oxygen, which is crucial for aerobic composting.
- Check Temperature: Higher temperatures inside the tumbler indicate active composting. If the temperature drops, it might be time to add more greens or turn the contents more frequently.
Summary
Compost tumblers offer a convenient and efficient way to manage organic waste and produce high-quality compost quickly.
Their enclosed design, ease of use, and effectiveness in controlling pests and odors make them an excellent choice for both beginners and experienced composters.
By incorporating a compost tumbler into your composting routine, you can enjoy the benefits of rapid and efficient composting, turning kitchen and garden waste into valuable, nutrient-rich compost for your plants.
Composting Methods at Home FAQs
Composting is a fantastic way to reduce waste and create nutrient-rich soil for your garden.
Whether you’re a seasoned gardener or a beginner, understanding different composting methods can help you choose the best approach for your needs.
Let’s dive into some frequently asked questions about composting to help you get started.
Q: Why is composting good for the environment?
A: Composting reduces landfill waste and lowers greenhouse gas emissions. Plus, it creates nutrient-rich soil for your garden.
Q: What is the best compost method for a garden?
A: It depends on your needs, but trench composting and vermicomposting are excellent for enriching garden soil.
Q: What is the laziest way to compost?
A: Cold composting is the easiest. Just pile it up and wait!
Q: What are 3 best practices for composting?
A:
- Balance greens and browns.
- Keep it moist but not too wet.
- Turn the pile regularly for aeration.
Q: How do I make the best garden compost?
A: Use a mix of kitchen scraps and yard waste, turn it regularly, and maintain proper moisture levels.
Q: How to compost directly into your garden?
A: Use trench or sheet composting to add organic materials directly to your garden soil.
Q: What is the most effective composting method?
A: Aerobic composting is quick and effective with regular turning and proper management.
Q: What are the three methods of composting?
A:
- Aerobic
- Anaerobic
- Vermicomposting
Q: What is the most common method of composting?
A: Aerobic composting is the go-to method for most backyard composters.
Q: What is the easiest composting method?
A: Cold composting is easiest. Just let nature do its thing!
By understanding these various composting methods and best practices, you can choose the approach that best fits your lifestyle and gardening needs. Happy composting!
Composting Methods at Home Conclusion
Composting is a versatile and environmentally friendly practice that can transform your kitchen and yard waste into nutrient-rich soil for your garden.
By understanding and choosing the right composting methods, you can contribute to reducing landfill waste and improving soil health.
Let’s recap the key points covered in this guide and explore some additional subtopics to enhance your composting knowledge.
Read more: Introduction to Sustainable Gardening: Comprehensive Guide
Recap of Key Points
- Understanding Composting Methods
- Trench Composting: Ideal for enriching garden rows with minimal effort.
- Windrow Composting: Suitable for large-scale composting projects, requiring regular turning.
- Aerobic Composting: Quick and efficient, needs regular aeration and moisture management.
- Cold Composting: Low-maintenance but slow, best for patient gardeners.
- Closed Bin Composting: Neat and contained, great for urban settings.
- Bokashi Composting: Uses fermentation for indoor composting, handles meat and dairy.
- Vermicomposting: Uses worms to create nutrient-rich castings, perfect for small spaces.
- Worm Bin: A controlled setup for vermicomposting, easy to manage indoors or outdoors.
- Aerated Static Pile Composting: Uses aeration systems, efficient for large volumes.
- Heap Composting: The classic pile method, simple but requires occasional turning.
- Sheet and Lasagna Composting: Directly enriches garden soil with layered organic materials.
- Plastic Composters: Durable and pest-resistant, easy to manage.
- Concrete Bins: Robust and long-lasting, ideal for handling large amounts of compost.
- Green Cone Food Composters: Solar-powered, efficient for kitchen waste.
- Electric Composters: Quick and odor-free, suitable for indoor composting.
- Best Practices for Successful Composting
- Balance Greens and Browns: Maintain the right ratio of nitrogen-rich greens to carbon-rich browns.
- Keep it Moist: Ensure the compost is damp but not soggy.
- Regular Turning: Aerate the compost to speed up decomposition and prevent odors.
- Avoid Certain Items: Refrain from adding meat, dairy, and oily foods to traditional compost bins.
- Benefits of Composting
- Reduces landfill waste and greenhouse gas emissions.
- Creates nutrient-rich soil, enhancing garden productivity.
- Supports sustainable living and reduces the environmental footprint.
Additional Subtopics
- Composting in Small Spaces
- Tips for Urban Composting: Explore methods like vermicomposting, bokashi composting, and electric composters that are ideal for apartments and small homes.
- Container Gardening: How to use compost in container gardens to maximize plant growth.
- Compost Troubleshooting
- Common Problems: Address issues like foul odors, pests, and slow decomposition.
- Solutions: Practical tips to resolve composting problems and maintain a healthy compost system.
- Seasonal Composting Tips
- Summer Composting: How to manage compost in hot weather to prevent overheating and drying out.
- Winter Composting: Strategies to keep composting active during colder months.
- Using Finished Compost
- Application Methods: Ways to use compost in garden beds, container plants, and lawns.
- Compost Tea: How to make and use compost tea to boost plant health.
Final Thoughts
By integrating composting into your gardening routine, you can turn waste into valuable resources, enriching your soil and supporting a healthier environment.
Whether you have a large backyard or a small balcony, there’s a composting method that can work for you.
Start composting today and enjoy the benefits of a greener, more sustainable lifestyle.
By understanding the various composting methods and best practices, you can make informed decisions that suit your lifestyle and gardening needs. Happy composting!


